
Recent Posts
How to Replace and Install the Control Arm Bushings?
Introduction: Understanding Control Arm Bushings
Control arm bushings are crucial components in your vehicle’s suspension system that serve as flexible connections between the control arms and the vehicle frame. These rubber or polyurethane components absorb road shocks, reduce vibrations, and allow for controlled movement of the suspension while maintaining proper wheel alignment. When these bushings wear out, they can significantly impact your vehicle’s handling, safety, and comfort.
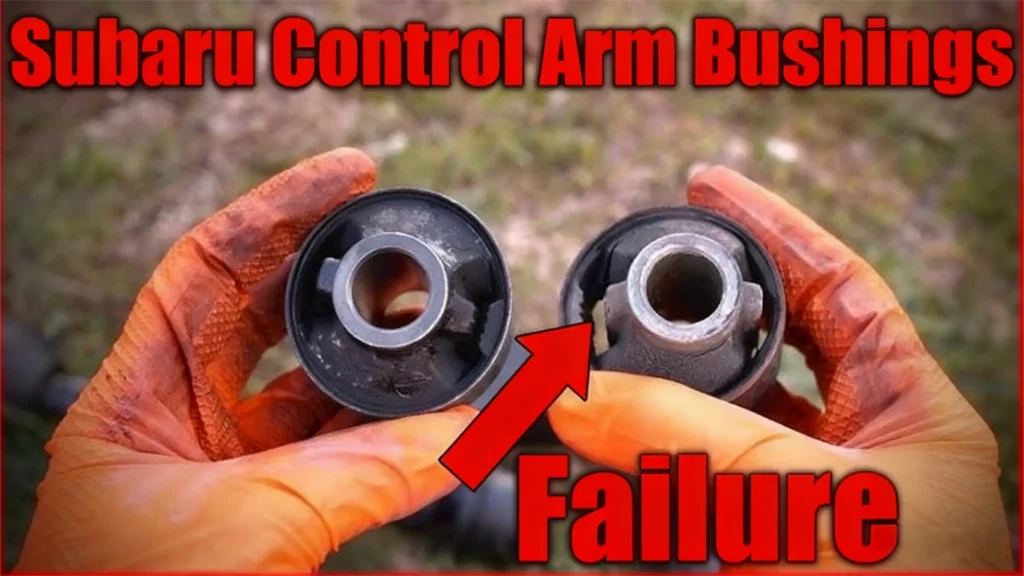
Table of Contents
1. Recognizing the Symptoms of Worn Control Arm Bushings
Audible Warning Signs
One of the first indicators of failing control arm bushings is unusual noises. Drivers often report:
Clunking or popping sounds when going over bumps or during acceleration and braking
Creaking or groaning noises at low speeds, particularly when turning or navigating speed bumps
Knocking sounds from the suspension during sharp turns or sudden maneuvers
Handling and Performance Issues
As bushings deteriorate, you may notice:
Loose or wandering steering requiring constant correction
Steering wheel vibration that transmits through to your hands
Vehicle instability during braking, often accompanied by pulling to one side
Reduced handling precision and increased body roll during cornering
Visible Indicators
Physical inspection can reveal:
Uneven tire wear patterns indicating alignment issues
Cracked, torn, or missing rubber components in the bushing
Fluid leakage from hydraulic bushings in some vehicles
Misalignment of the inner metal sleeve within the bushing
2. Diagnostic Procedures: Confirming Bushing Failure
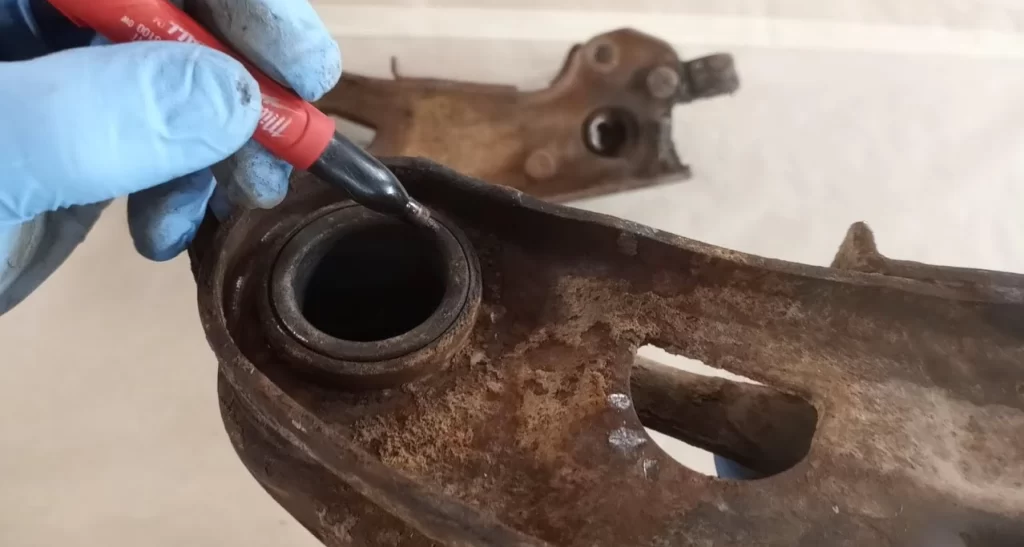
Visual Inspection Techniques
Conduct a thorough visual examination by:
Safely lifting the vehicle and supporting it with jack stands
Cleaning the control arm and bushing area for clear visibility
Using a flashlight to inspect for cracks, separation, or deformation
Checking for rust or corrosion around bushing mounting points
Physical Testing Methods
Pry Bar Test: Carefully insert a pry bar between the control arm and frame, applying gentle pressure to check for excessive movement
Wheel Shake Test: With the vehicle elevated, grasp the tire at 3 and 9 o’clock positions, rocking it to detect play
Bushing Twist Test: Observe if the bushing twists excessively during suspension movement

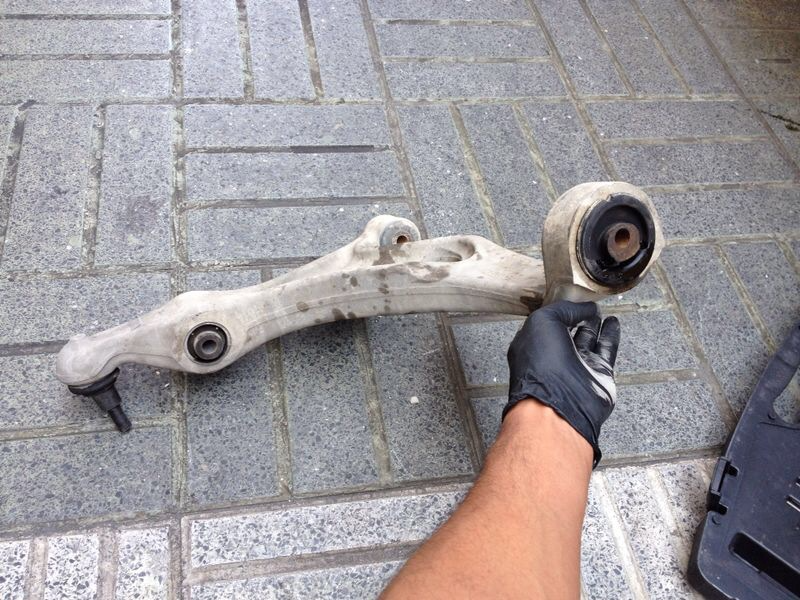
3. Replacement Considerations: Bushing vs. Complete Control Arm
When to Replace Only the Bushings
Bushing-only replacement may be appropriate when:
The control arm itself is in good condition without rust or damage
The vehicle design allows for separate bushing replacement
Budget constraints make this the more economical choice
Performing restoration work on classic or specialty vehicles
Advantages of Complete Control Arm Assembly Replacement
Modern repair strategies often favor complete control arm replacement because:
Time efficiency: Most mechanics can replace an entire assembly faster than pressing individual bushings
Comprehensive repair: Includes new ball joints that often wear simultaneously with bushings
Reduced labor costs: Fewer workshop hours can offset the higher parts cost
Warranty coverage: Complete assemblies often come with better warranty protection
4. Professional Replacement Process: Step-by-Step
Preparation and Safety Measures
Vehicle Securing: Park on level ground, engage parking brake, and place wheel chocks
Proper Lifting: Use a quality floor jack and support with jack stands rated for the vehicle weight
Personal Protective Equipment: Wear safety glasses and gloves throughout the process
Control Arm Removal Procedure
Wheel Removal: Loosen lug nuts before lifting, then remove wheels completely
Component Disconnection:
Separate ball joint from steering knuckle using appropriate tools
Disconnect sway bar links if necessary
Remove stabilizer bar connections
Control Arm Unbolting:
Note bolt orientation for reassembly
Use penetrating oil on corroded fasteners
Support the control arm during final bolt removal
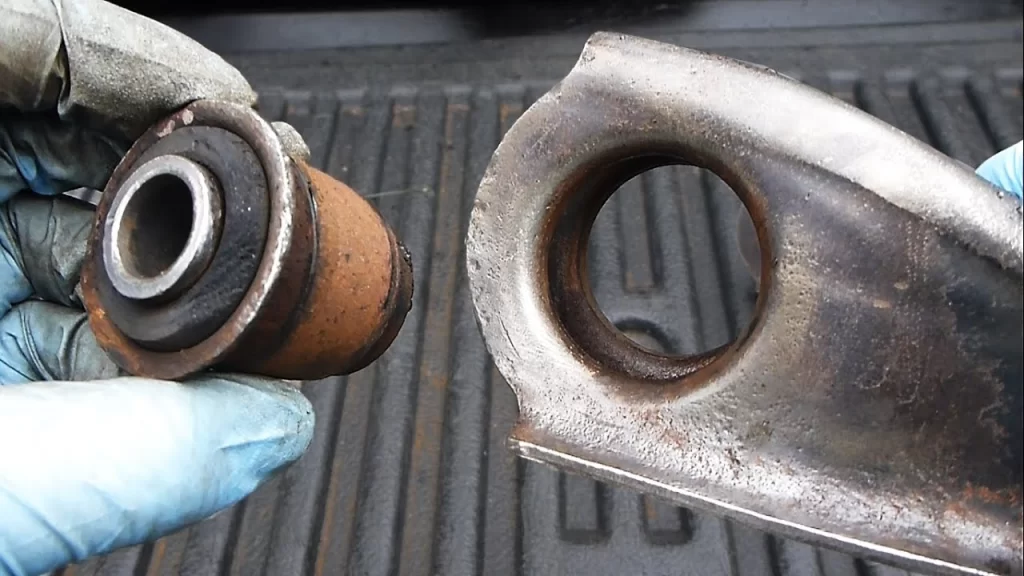
Bushing Replacement Techniques
Pressing Out Old Bushings:
Use a hydraulic press or specialized bushing removal tools
Support the control arm properly to prevent damage
Apply steady, even pressure to avoid distortion
Installing New Bushings:
Ensure correct orientation according to manufacturer specifications
Use appropriate adapters to press evenly on the outer sleeve
Verify the bushing is seated completely and squarely
Reassembly and Final Steps
Control Arm Reinstallation:
Position the control arm correctly
Install bolts hand-tight initially
Component Reconnection:
Reattach ball joints and other suspension components
Replace any stretch bolts or specific fasteners as required
Final Torquing:
Tighten all fasteners to manufacturer specifications
Critical: Final bushing bolts must be tightened with the vehicle at normal ride height
5. Post-Installation Requirements
Wheel Alignment
A professional wheel alignment is absolutely essential after any control arm or bushing replacement. Failure to align properly will result in:
Rapid, uneven tire wear
Poor vehicle handling
Reduced fuel efficiency
Potential safety hazards
Test Drive and Inspection
After completion:
Conduct a careful test drive at low speeds initially
Listen for unusual noises
Verify proper handling characteristics
Re-check torque specifications after 50-100 miles
6. DIY vs. Professional Service: Making the Right Choice
DIY Replacement Considerations
While possible for experienced home mechanics, DIY bushing replacement presents challenges:
Specialized tool requirements: Hydraulic presses or bushing tools are necessary
Technical knowledge: Understanding torque specifications and procedures is crucial
Safety concerns: Working with suspension components carries inherent risks
Time investment: The process typically takes 3-5 hours per side for inexperienced mechanics
Benefits of Professional Service
Proper equipment: Shops have presses, alignment machines, and experienced technicians
Efficiency: Professionals typically complete the job in 2-3 hours per side
Warranty protection: Most shops guarantee their work
Comprehensive inspection: Professionals can identify related issues needing attention
At MYWAY, we engineer our control arm bushings to exceed OEM specifications, providing:
Advanced Material Technology
Premium rubber compounds resistant to heat, ozone, and environmental degradation
Precision molding for consistent performance and perfect fitment
Optimized design for reduced vibration transmission and improved comfort
Application-Specific Solutions
MYWAY offers comprehensive bushing solutions for:
Passenger vehicles from compact cars to full-size SUVs
Performance applications with enhanced handling characteristics
Commercial vehicles requiring heavy-duty durability
Custom solutions for specialty and restoration projects
Quality Assurance
Every MYWAY bushing undergoes rigorous testing for:
Load capacity and durability under extreme conditions
Environmental resistance to temperature extremes and contaminants
Long-term performance through accelerated life cycle testing
8. Cost Analysis: Understanding Your Investment
Parts Cost Breakdown
Individual bushings: $20-$80 each depending on vehicle and bushing type
Complete control arms: $100-$400 per side including new bushings and ball joints
MYWAY solutions: Competitively priced with superior performance characteristics
Labor Cost Considerations
Professional installation: 2-3 hours labor per side at $80-$150 per hour
Wheel alignment: $100-$200 depending on vehicle and shop
Total investment: $300-$1,200 for most vehicles depending on repair approach
9. Conclusion: Ensuring Safety and Performance
Control arm bushing replacement is a critical maintenance procedure that directly impacts your vehicle’s safety, handling, and comfort. Whether you choose to replace individual bushings or complete control arm assemblies, using quality components like MYWAY bushings ensures long-lasting performance and reliability.
For severe bushing wear or when replacing multiple suspension components, consider professional installation to guarantee proper procedure adherence and alignment. Remember that timely bushing replacement protects your investment in tires and other suspension components while maintaining the safe operation of your vehicle.
Explore MYWAY’s complete range of suspension solutions designed to restore and enhance your vehicle’s performance. Our technical support team is available to help select the ideal bushing solution for your specific vehicle and driving requirements.
Visit our product catalog or contact our technical specialists for personalized assistance with your suspension repair needs.
10 Frequently Asked Questions (FAQ)
How long do control arm bushings typically last?
Control arm bushing lifespan varies by vehicle type, driving conditions, and material quality. Most OEM rubber bushings last 60,000-100,000 miles, while premium aftermarket solutions like MYWAY bushings can extend this interval significantly. Harsh driving conditions, extreme climates, and poor road quality can accelerate wear.
Can I replace just one control arm bushing, or should I do both sides?
While it’s possible to replace only the failed bushing, we strongly recommend replacing both sides simultaneously. When one bushing fails, the opposite side has typically experienced similar stress and is likely near failure. Replacing both ensures balanced handling and prevents a return visit for the same repair.
What's the difference between rubber and polyurethane bushings?
Rubber bushings provide excellent vibration damping and quiet operation, making them ideal for daily driving. Polyurethane bushings offer increased stiffness for improved handling response but may transmit more road noise. MYWAY offers both material types to match your specific driving needs and preferences.
How urgent is control arm bushing replacement?
Worn control arm bushings should be addressed promptly. While not an immediate emergency in early stages, significantly worn bushings compromise vehicle stability, braking performance, and tire wear. We recommend replacement within 1,000 miles of diagnosis to prevent secondary damage and maintain safety.
Will replacing control arm bushings improve my vehicle's ride quality?
Yes, replacing worn bushings typically restores original ride quality by eliminating excess suspension movement, reducing noise and vibration, and improving steering precision. Many customers report their vehicle feels “like new” after bushing replacement with quality components like MYWAY products.
What makes MYWAY bushings superior to other aftermarket options?
MYWAY bushings feature advanced compound formulations, precision manufacturing tolerances, and rigorous quality control. Our bushings are engineered to provide optimal balance between comfort and performance, with enhanced durability characteristics that outperform standard replacement parts.
100000+ Types of Bushings – Contact Us for Details